
Tile grout thickness: complete guide to 7 installation questions

By Osman Orman · Tile and technical specialist at Tegelmonsters
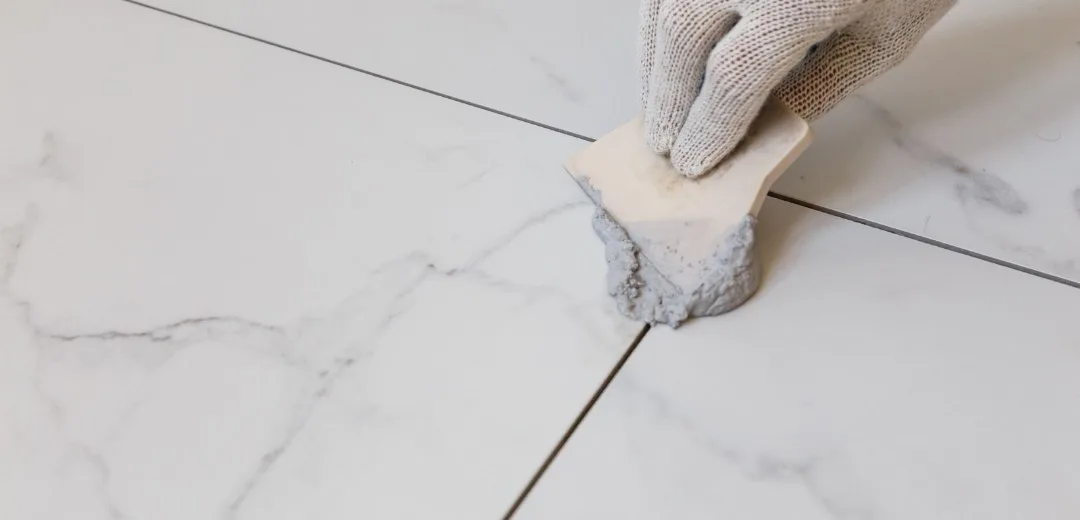
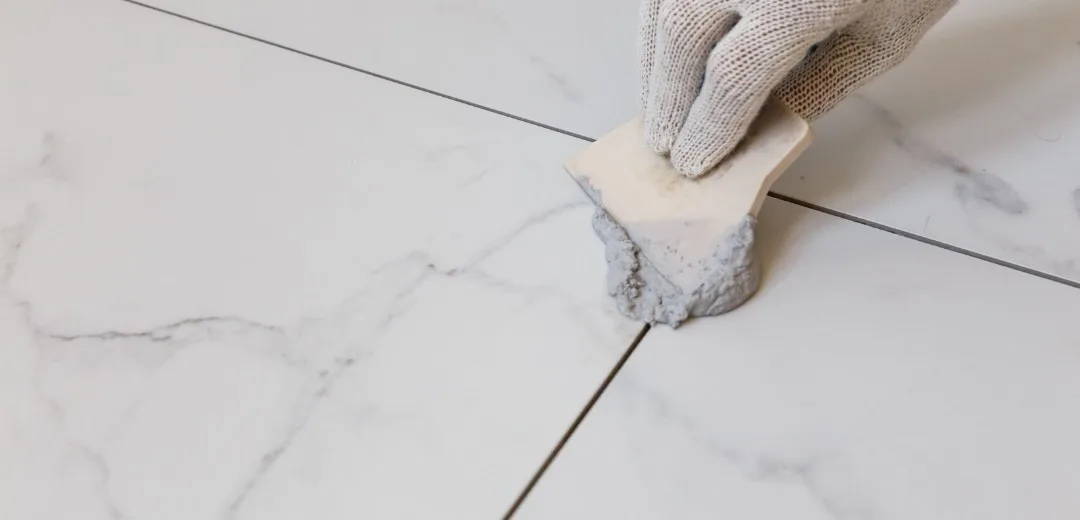
The tile joint thickness is the depth over which you fill the seam between two tiles, and ideally, this filling extends to the full tile thickness. A half-filled joint is a weak joint.
For a project specification, the tile joint thickness is a different question than the width. Here, it concerns the structure: the adhesive layer underneath, the contact surface, and how deep the grout sits.
Tile joint thickness revolves around the vertical structure, not the horizontal width. You fill the joint across the entire tile thickness and compact it so that no voids remain. Beneath this lies a layer of adhesive of 2 to 5 mm, applied with a notched trowel suitable for the size. For the horizontal width, we refer to our separate guides. On the free sample request via tegelmonsters.nl/tegels, we match size, thickness, and structure to your project.
In this article
- How thick should the tile grout be?
- What is the difference between joint width and joint thickness?
- Why do you need to fill the joint to the full depth?
- Which adhesive layer thickness and notched trowel correspond to the joint construction?
- How much adhesive contact does a tile need under the grout?
- How does the joint structure differ between wall and floor?
- How do you put together a sample pack for your project?
- Frequently asked questions
Directive
How thick should the tile grout be?
The tile joint thickness is the depth over which you fill the seam between two tiles with grout. This measurement follows the tile itself. A ceramic floor tile is typically 8 to 11 mm thick, so the joint must fill that seam over almost its full height and end just below the surface. This ensures the tile edge receives support along the entire flank, and not just at the top.
Many project questions concern width, but depth determines strength. A joint that is only a few millimeters deep looks fine from above but still leaves a hollow space. This cavity collects moisture and dirt and provides no counter-pressure to the edge. The ceramic standard EN 14411 specifies the dimensional tolerances and thicknesses of tiles, and that thickness is the starting point for how deep to fill. Background information on water absorption and ceramic classes can be found in our article on water absorption of ceramic tiles.
There is another layer at play that you cannot see. Beneath the tile lies the adhesive, and its top edge determines where the grout depth ends. The grout and adhesive layer together form the structure that holds the tile in place. That is why, when specifying a condition, we always look at the combination of tile thickness, adhesive bed, and grout filler, not at any one of those three in isolation.
Definition
What is the difference between joint width and joint thickness?
The two concepts are often confused, but they are diametrically opposed. You measure the width from tile to tile, across the surface. You measure the thickness from top to bottom, through the joint. A joint can be narrow yet deeply filled, or wide and only half-filled. Both measurements contribute to the strength of the tiling, each in its own way.
The width is determined by the format, zone, and the dimensional tolerance of the tile. We have already elaborated on this choice, so we will summarize it briefly here: indoors, the width is often between 2 and 4 mm, and outdoors at a minimum of 5 mm. You can read the full justification per zone and format in our selection guide for joint width per zone . A separate guideline applies to tiles with a clean-cut edge, which we detailed in the guide on rectified tiles and joint width.
This guide deals with the other dimension: the tile grout thickness and the underlying structure. While width defines the visual appearance, depth determines how sturdy the joint is and how well it repels water. An architect who only specifies the width leaves half the story open. Grout depth and the adhesive layer also belong in a good specification, and that is precisely what the rest of this article is about.
Filling
Why do you need to fill the joint to the full depth?
A joint has more work to do than just seal the seam. It provides lateral bonding to the tile edge, keeps moisture out of the structure, and absorbs the slight movement that every tile exhibits under temperature. All these functions require the grout to fill the seam to its full depth and be well compacted. A hollow joint lacks that bond and only works partially.
An incompletely filled joint usually occurs in two ways. Grout that is too coarse cannot be pressed into a narrow seam and gets stuck at the top. Or the mortar is insufficiently compacted and sinks after hardening. In both cases, a cavity remains beneath the visible surface. In wet areas, this compromises the waterproofing, and on a floor, dirt accumulates that is impossible to remove. How to keep a joint clean over time depends on the color and filling, and our article on cleaning tiles provides practical guidelines on this.
The industry guidelines for ceramic tiling summarize tile grout thickness simply: a joint only works if it is complete and compacted. That is not a luxury, but the foundation. In the projects handled by us, we see that proper joint filling makes the difference between a floor that remains flawless for ten years and one that requires touch-ups after two winters. Attention is paid to the width, but the depth determines the lifespan.
Adhesive layer
Which adhesive layer thickness and notched trowel correspond to the joint construction?
Under every joint lies a layer of adhesive, and that layer corresponds to the joint thickness of the tiles and their construction. The standard working method is the thin-bed method, in which you comb the adhesive into ridges with a notched trowel and press the tile into them. This is called a thin-bed because the layer remains thin after pressing down, usually 2 to 5 mm, instead of the thick mortar beds of the past. The German laying guideline DIN 18157 describes this method for ceramic cladding.
The tooth spacing of the trowel determines how much adhesive you apply. A tiler lays a small wall tile using a trowel of 6 to 8 mm. From a size of 60×60 cm, the trowel increases to 10 mm, and for slabs—the thin, large sheets starting from approximately 75 cm—12 to 15 mm is used. The ridges are not an end in themselves: when pressed down, they flatten into a continuous bed without air pockets. Our method for sawing XXL tiles and slabs helps with cutting these large sheets to size.
The adhesive itself is standardized. The European standard NEN-EN 12004-1 classifies tile adhesive into classes. A C2 adhesive has a bond strength of at least 1,0 N/mm², and additional letters indicate properties: T for stability, E for a longer open time, and S1 or S2 for deformability. For large format tiles and underfloor heating, you typically choose a deformable C2 adhesive that accommodates minor movement, a point we elaborate on in our article about tiles and underfloor heating.
Notched trowel notch size per tile size (mm)
Scale runs up to 15 mm. The rod length scales with the recommended notched trowel according to industry guidelines for ceramic tiling.
| Wall up to 30×30 |
|
6 mm | ||
| Floor up to 45×45 |
|
8 mm | ||
| From 60×60 |
|
10 mm | ||
| Slabs from 75 cm |
|
12 to 15 mm |
A thicker notch does not mean wasting more adhesive, but rather enough adhesive for a closed bed under a larger tile. With teeth that are too small under large format tiles, air pockets remain, and you notice this later when a tile sounds hollow. The choice of notch is therefore not a minor detail, but one of the four dimensions that determine the tile grout thickness, alongside tile thickness, grout depth, and grout width.
Contact surface
How much adhesive contact does a tile need under the grout?
The contact surface is the part of the tile back that is actually attached to the adhesive, and it indirectly supports the tile grout thickness. The higher this percentage, the better the tile is anchored and the fewer voids there are underneath. Industry guidelines for ceramic tiling stipulate a minimum of 80 percent for an indoor wall. On a floor and for all outdoor applications, that requirement rises to 95 to 100 percent, because load, frost, and water are added.
You rarely achieve that full contact with single-sided bonding. The method is called buttering-floating, also known as double-sided bonding. You comb the adhesive onto the substrate and simultaneously apply a thin layer to the back of the tile using the flat side of the comb. When pressed down, both layers flow into each other to form a closed bed without air inclusions. For large slabs, this is the standard, not the exception, and it forms the basis for a joint that receives support over its full depth.
A common assumption is that a narrow joint makes the structure underneath less important. The opposite is true: precisely with a narrow, deep joint, the adhesive bed must be completely sealed; otherwise, moisture is drawn in through the cavity. During the specification phase, our specialists review tile thickness, trowel selection, and contact surface together. Schedule an appointment via the page. touch with if you have a project in preparation.
The range includes formats that call for this approach. Pamesa Ceramica from Spain, known for a wide porcelain tile assortment ranging from slabs to a hydrogen-powered production line, supplies slabs where buttering-floating and a full contact surface logically go hand in hand. Porcelain tile is a fully fired, dense ceramic tile with low water absorption. For the project side of this format, architects often filter by size before requesting samples, and the background to this is explained in our article on large-format tiles in projects.
Physically assess thickness and structure. The tile grout thickness and adhesive bed turn out differently for a slab compared to a small wall format. Request free samples and assess the tile thickness by hand before the specifications are sent out.
Wall versus floor
How does the joint structure differ between wall and floor?
Walls and floors require different tile grout thicknesses and construction methods because they serve different purposes. A wall tile is typically 6 to 10 mm thick and bears no weight, so the grout is shallower and the requirements for the adhesive bed are lower. A floor tile more often measures 8 to 11 mm and bears foot traffic and furniture loads, requiring the grout to be deeper and better compacted. An outdoor patio tile can even be 20 mm thick, with a correspondingly deep grout.
The zone also determines the additional requirements. On an interior wall, the load is low and exposure to water is limited to splashing, except in a shower room. On a floor, the compaction of the joint carries more weight, as everything rolls and walks over it. Outdoors, the frost-thaw effect comes into play: water in a hollow joint expands during frost and forces the seam open. Through Building Decree 2012, the Building Decree sets performance requirements for floors in wet rooms and for the flatness of finishing layers, and that flatness partly determines how evenly the joint can be filled.
For a small-format wall, the construction works slightly differently. Ceragni from Portugal, known for small wall formats in a wide Basic color range, supplies tiles where a finer crest and a shallower grout match the light weight. On such walls, the grout color often dominates the look, while the grout thickness of the tiles underneath remains modest. For bathroom projects, we link the wall and floor constructions, as both zones meet there. If you want to understand the role of a clean-cut edge in this context, our explanation of rectified tiles provides the background.
Sample package
How do you put together a sample pack for your project?
On the tiles page, you can filter for free by zone, size, color, and finish. For each project, you choose the application page that matches the focus of the design, and you immediately see which collections are in stock and available as samples. This way, you link the tile grout thickness and the corresponding structure to an actual size rather than a number on paper.
With the Monstermap tool, you bundle the tiles by project and keep track of the selection centrally. This is especially helpful when walls and floors are involved in the process simultaneously and the build-up heights need to align. You combine the zones and share the selection with your client before the samples are delivered. The most frequently asked question our team receives concerns precisely that connection between wall and floor.
Filter by zone and bundle your project. Choose an application, filter by size, and specifically evaluate tile thickness and grout structure. This ensures the sample package meets your project's requirements exactly.
Kitchen tiles Bathroom tiles View large format tiles Open the Sample Folder
In the projects handled by us, we are increasingly seeing that an initial filtering round is completed online, followed by a physical assessment in our showroom in Utrecht. This keeps the sample request process accessible, and the showroom appointment serves as a targeted in-depth look at an already narrowed selection, during which we review the tile grout thickness together. The showroom is accessible to professionals by appointment only.
The grout thickness is part of the construction of a tiled floor. The complete step-by-step plan can be found in our guide on laying tiles.
Frequently asked questions
How deep should a tile joint be filled?
A tile joint must be filled to its full depth, equal to the thickness of the tile plus the top edge of the adhesive layer. For a 10 mm floor tile, this means a joint that is completely filled and compacted with grout right up to the surface. A half-filled joint leaves a void and weakens the edge and the waterproofing.
Is joint thickness the same as joint width?
No. Joint width is the horizontal distance between two tiles, usually 2 to 5 mm. Joint thickness or joint depth is the vertical measurement: how deep the grout fills the joint, up to the tile thickness. For a strong joint, both count, but they are two different measurements that you specify separately in a specification.
How thick is the adhesive layer under a tile?
With the thin-bed method, the leveled adhesive layer is typically between 2 and 5 mm, depending on the size and flatness of the substrate. Small tiles are laid using a notched trowel of 6 to 8 mm; for sizes from 60×60 cm, use 10 mm; and for slabs, 12 to 15 mm. The adhesive ridges are smoothed flat into a closed bed when pressed down.
What happens with an incompletely filled joint?
An incompletely filled joint leaves a hollow space behind. Moisture and dirt accumulate there, the tile edge lacks support, and the waterproofing in wet areas is less reliable. In practice, this is caused by mortar that is too coarse in a narrow joint or by insufficient compaction. A fully compacted joint prevents this.
Which notched trowel do you use for large format tiles?
For large formats from 60×60 cm, use a notched trowel with 10 mm teeth, and for slabs from 75 cm, a 12 to 15 mm trowel, in combination with the buttering-floating method. With this method, you coat both the substrate and the back of the tile. This achieves a contact surface of 95 to 100 percent, which is the requirement for floors and outdoor areas. Request free samples via tegelmonsters.nl/tegels to assess size and thickness in advance.
Ready to fix your joint build-up?
Request a free sample pack and physically assess the size, tile thickness, and grout structure before the specifications are sent out.
Sources
- NEN. NEN-EN 12004-1:2017 – Tile adhesive: classification, C1 and C2 with additional letters.
- DIN 18157 – Application of ceramic cladding using the thin-bed method, notched trowel and embedding.
- NEN-EN 13888-1:2022 – Tile grouting mortars: classification and designations.
- EN 14411 / ISO 13006 – Ceramic tiles: definitions, dimensional tolerances and thicknesses.
- Building Decree 2012 – Performance requirements for floors in wet rooms and flatness of finishing layers.
- Industry guidelines for ceramic tiling – Contact surface percentages and buttering-floating method.